Mind Mapping Mum

Etre curieux et découvrir.Imaginer et créer.Inspirer et connecter...Ensemble embarquons...


samedi 26 février 2011

Une pinata pour un anniversaire ...ou juste pour le plaisir

Making Piñatas

by Amy on October 7, 2010
 A few weeks ago, the girls and I were learning about Mexico and read a neat book called The Piñata Maker. So, of course, we had to make our own piñatas!
We made some papier-mâché paste using this recipe from Family Fun. I can’t believe I have never made this type of paste before – all you need is flour, water, and sugar. It’s so easy to make and lovely and smooth to work with. (And way better than using liquid starch like I have done in the past!)

After the paste cooled, we were ready to get messy! We made simple round piñatas using balloons. You will see that we started with our balloons balanced on cups, but we ended up switching to bowls because the balloons become very hard to balance when they have the weight of dripping newspaper strips on them.

The girls dipped a strip of newspaper in the paste and slid their fingers down the strip to remove some of the excess. Keep applying strips till the whole balloon is covered, except for the area around the knot.

At one point, Delaney had so much paste on her hands that she could just rub the strips between her hands and apply!

The girls did approximately three layers of newspaper – we weren’t too concerned with sturdiness since these were just for one person, not a whole party full of kids.
We set our very wet piñatas to dry in the sun. As you can see, we had plenty of paste leftover for playing!

I gave the girls the choice of painting or using colored tissue paper to decorate their piñatas.  They decided to paint them – we used acrylic craft paint for better coverage.

The girls also painted a piece of newspaper to use for covering the hole. The paint dried and details were added with construction paper (taped on) and black sharpies.
We popped the balloons and held on to the knot end tightly as the balloon pulled away from the inside of the piñata.  Filling with candy was next!
We covered the hole with our piece of painted newspaper – it wasn’t the prettiest way to cover the hole, but it served our purpose.
We used a paper clip and yarn to hang the pinñatas.  Natalie wasted no time in smashing her piñata and getting her candy out.

Delaney wasn’t sure she wanted to hit her cute piggy. I told her we could just dump the candy out of the hole, but she decided to go ahead and get her candy out the traditional piñata way – hitting and more hitting!


Our simple piñatas were such a success, we would all like to do more papier-mâché projects – maybe bowls or puppets or birds?
I’m pretty sure my girls wouldn’t complain if I just made them a big batch of paste to play with, too. :)

un tableau de reconnaissance à faire avec les enfants

Give Thanks – Paper Quilt

by Amy on November 18, 2010
Post image for Give Thanks – Paper Quilt I wanted to do a project with the girls that would help us focus on gratitude and all the many things we have to be thankful for. Last year, we wrote Thankful Poems and we enjoyed pulling those out and reading them again.
We’ve done all sorts of turkey projects in the past, which always turn out cute – I’ve seen some really creative crafts and activities out and about blogland this year. For some reason, though, I was not feeling inspired!
A few days ago, we were puttering around with craft stuff and ended up putting together a paper quilt project using things we had around the house. I love how it turned out – sometimes those spur-of-the-moment things are the best!
We started with an 18″x24″ canvas (that has been taking up space and needing a purpose). The girls helped me look through our stash of scrapbooking paper scraps for blues, greens, and browns. I cut 3″ squares and we used Mod Podge to attach them patchwork-style to the canvas.

We then set to work creating little paintings of things we are thankful for. We used 3″ squares of white cardstock, extra-fine Sharpies, and watercolors with tiny brushes.


We let our little paintings dry, then used Mod Podge again to glue them to the canvas. I just love the combination of the girls’ handwriting and their tiny drawings!

Here is the finished product, in all its simple-and-meaningful glory. We gave it a nice place of honor in our living room, and I can see myself enjoying it year-round.

Do you have any gratitude projects in the works at your house? Anyone using a gratitude journal with kids – I’m thinking of doing something along those lines and would love to hear your ideas!

Calendrier familial 2

Calendrier familial 1

Picture Frame Calendar

by Amy on February 7, 2011
Dry-Erase Picture Frame Calendar Happy Monday evening! Hope you had a wonderful weekend.  My family is finally healthy after coming down with a stomach bug one after the other – I was the only lucky one who didn’t get it (knock-on-wood….).
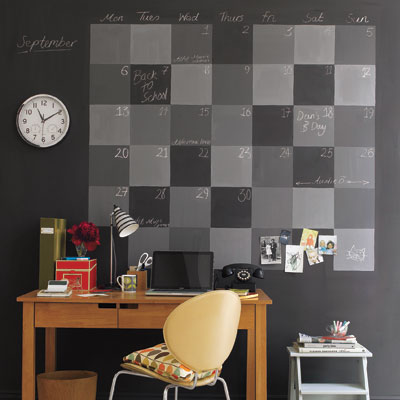
My niece turned 12 over the weekend, and I made her this fun dry-erase calendar out of a picture frame. I love how it turned out, and so did she!
I painted a wood picture frame that was sitting around my house waiting for a purpose. It took about 5 coats of acrylic craft paint – spray paint probably would have been faster, but I didn’t have any.

I covered the cardboard picture frame back with white easel paper. The calendar was made from 2.25″ squares of scrapbook paper. I used letter stickers to mark the days of the week and a space to write the month. Each square also got a white dot sticker to make a spot for writing the date. My niece really liked the little spot for notes going down the side. The quote sticker says, “Nothing great was ever achieved without enthusiasm.”

When it was finished, I just popped it into the frame and tied on a pack of dry erase markers (clickable – no lids!) and an eraser. I hope it gets lots of good use in my niece’s room. I’m thinking we could use a cute dry-erase calendar, too – I’ll have to see if I have any more frames that need a job!

une ardoise magique à faire soi_même

Paint Bag Writing

by Amy on October 6, 2009
Learning to write letters and numbers can be frustrating for little hands!  I like to offer lots of play activities that help build those fine motor skills in a relaxed, fun way.  Toddlers and up will enjoy making shapes, swirls, and even letters on a ziploc bag filled with paint!
To make your own paint bag writing tablet, put some finger paint or tempera paint into a sturdy freezer ziploc bag.  Seal it well and smoosh the paint around the entire bag.  (You could even add a strip of packing tape across the top if you are worried about your child opening the bag!)  That’s it!
paint_bag1
We like to tape ours down to the table so it doesn’t wiggle around too much.  Try doodling and writing with your finger first.  Your child may also enjoy using a cotton swab to write with.  When your tablet is full of scribbles (or sight words for older kids!), smoosh and smear the paint around and start over.  No mess, just fun!
paint_bag2
Happy playing!

Idée comment afficher les dessins de vos enfants

DISPLAYING ARTWORK

012-1

Brico idée...


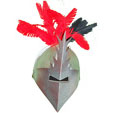
Brico: Chapeau de chevalier


casque de chevalier

Les apports du bricolage du casque de chevalier

  • Fabriquer une partie de son déguisement pour le carnaval, une fête d'enfants ou un spectacle
  • Préparer un casque de chevalier pour compléter un déguisement
  • Développer la dextérité

Fournitures :

  • 3 assiettes en carton
  • Du papier crépon de couleur au choix
  • Du papier à dessin
  • Une bombe de peinture argent
  • Des ciseaux
  • Une agrafeuse
  • De la colle
  • Deux attaches parisiennes

Réalisation du casque de chevalier blanc

Pour le casque :

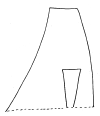
Imprimez la visière pour faire le casque de chevalier :

Selon son âge aidez votre enfant à :
  • Attacher 3 assiettes à l'aide d'une agrafeuse de manière à former un casque comme sur le modèle : 2 assiettes sur le devant et 1 au dos. Les agrafes de doivent pas dépasser la moitié de la hauteur d'une assiette.
 

  • Plier la feuille de papier à dessin en deux, dessiner la visière en s'aidant du modèle, puis la découper. Découper la fente pour les yeux.
visière casque
  • Découper un motif d'au moins 3 cm de haut et 4 cm de large.
haut de visiere
  • Agrafer le motif sur le haut de la visière.

  • Positionner la visière sur le casque et faire un trou de chaque côté de la visière et sur le bas des assiettes de côté.
cliquer pour voir en grandcasque
  • Peindre toutes les parties du casque avec une bombe de peinture.
peindre le casque
  • Attacher la visière à l'aide des attaches parisiennes.

Pour les plumes :

  • Choisir les couleurs du papier crépon pour les plumes du casque.
  • Découper une bande de papier crépon de 12 à 15 cm de haut. Dérouler et plier la bande de manière à obtenir un rectangle de 6 cm de large environ.
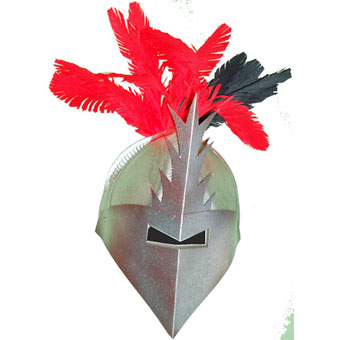
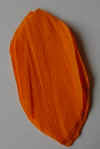
  • Découper la forme des plumes comme sur le modèle   
  • Franger les plumes 
  • Attachez les plumes en bouquet avec une agrafe.
casque de chevalier